
![]()
Download the Kennel Assembly Instructions here.
The basic installation steps are always the same for our Dog Kennels - regardless of your layout. The only difference is the measurements between the posts. Below you will find common layouts and the specific dimensions for them.
Some sloped floors pose significant obstacles. Extra adjustments on-site might be needed if your floors are sloped.
Learn about why we do NOT recommend sloping your floors here.
Download a guide to deal with sloped floors in your kennels here.
Kennel components:
- Kennel Post-kit.
- Kennel Panels.
- Kennel Gates.
- Wall Brackets. (only if you are attaching the kennels to your existing wall)
Tools needed:
- Chalk-line or line to mark out where you want the kennels.
- Hammer Drill with 3/8 Masonry bit.
- Hammer.
- 1/2 inch socket or end-wrench.
- 7/16 inch socket or end-wrench.
- 3/8 inch socket or end-wrench.
- Phillips Screwdriver.
- *If you are attaching to your existing walls - you will need the appropriate anchor(s) to attach the wall-brackets*
- Mark the corner of the area you want the kennels to sit.
- A chalk-line works great for this!
- Check the corners for square.
- If you do not have a square - a simple measure-test can determine how square you are. See the downloadable instructions for complete details on how to measure for square.
- Anchor a post-foot in one corner.
- Measure to the next post.
- We supplied a measure-stick with pre-marked holes that fit the top of the post-feet to make it easier!
- Anchor a second post-foot in place.
- Continue until all the post-feet are in place.
- Once you get 4 post-feet in place, you can start to construct the rest of the kennel.
- Set the posts on the feet and bolt them into place.
- Install the skirt dust-cover.
- Bolt the panels to the posts.
- Panels wider than 4ft will have 3 parts to them - be sure to check your printed instructions for more information.
- The rubber gasket goes on the bottom - against the floor.
- Attach the hinge-bars to the posts.
- The paw-prints should be at the TOP (if there are any).
- Attach the header-piece to the posts.
- Drop the gate into the eye-bolts you want to act as the hinge.
- The gate will not reach the other side yet - we have more pieces to add.
- Attach the latch-assembly to the other side of the gate.
- Attach the post-cap.
- Attach the gate safety screw.
- This keeps the dogs from lifting the entire gate off the hinges.
- Attach the latch-lock to the top of the gate.
- This keeps the dogs from lifting the latch while inside the kennel.
- Loosen the header-piece.
- Have someone PUSH the top of the LATCH-post.
- While pushing, have someone tighten the header-piece.
- Pull gate off the hinge-bars.
- Screw the TOP eye-bolt IN on the hinge-side.
- Screw the BOTTOM eye-bolt OUT on the hinge-side.
- Re-hang the gate.
- If needed-adjust the eye-bolts on the latch-side to match.
Download these instructions.
Learn how to care for your kennels by clicking here.
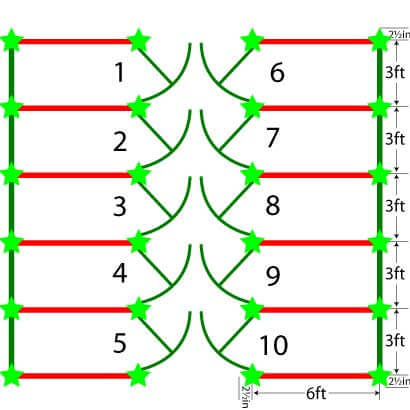
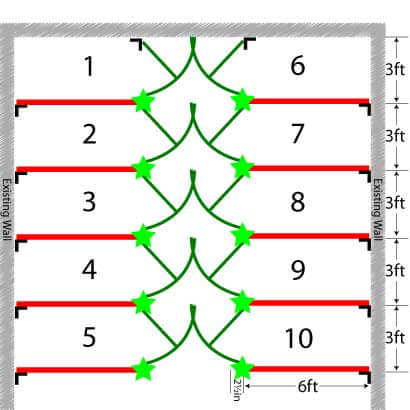
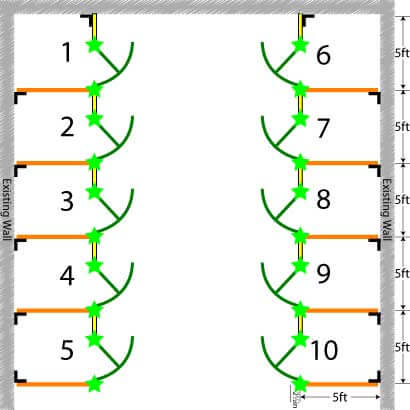
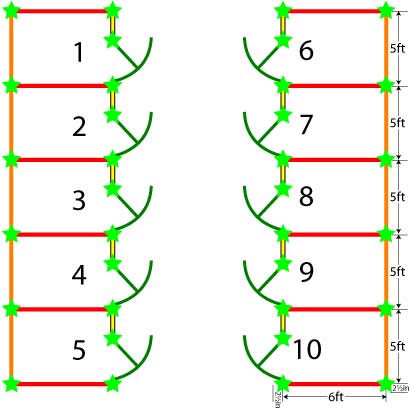
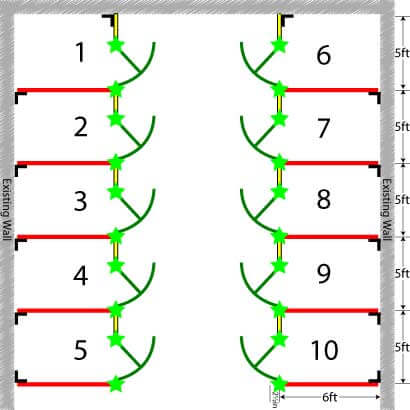
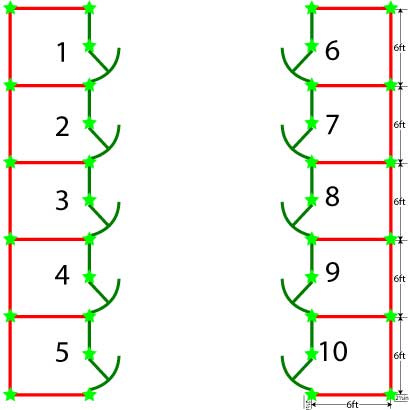
Below are some common layouts and dimensions.
Click on the dimension your kennels will be to see the dimensions. Click the image to download an easier to read printable view of the layout.
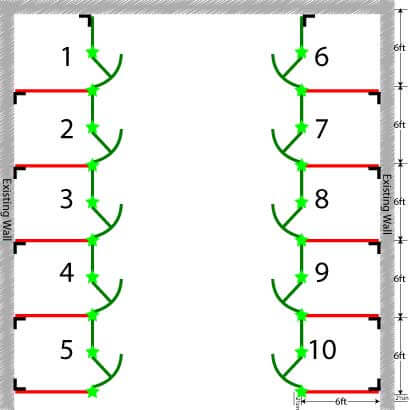
Our kennels can either be free-standing or use your existing walls as part of the kennel structure.
Using your walls can save you money - but only works if the walls are 'dog-proof'!
| 3' x 4' Full Kennels | 3'x 4' Kennels attached to a wall |
|
|
|
| Download the Layout | Download the Layout |
Our kennels can either be free-standing or use your existing walls as part of the kennel structure.
Using your walls can save you money - but only works if the walls are 'dog-proof'!
| 3' x 5' Full Kennels | 3' x 5' Kennels attached to a wall |
|
|
|
| Download the Layout | Download the Layout |
Our kennels can either be free-standing or use your existing walls as part of the kennel structure.
Using your walls can save you money - but only works if the walls are 'dog-proof'!
| 3' x 6' Full Kennels | 3' x 6' Kennels attached to a wall |
|
|
|
| Download the Layout | Download the Layout |
Our kennels can either be free-standing or use your existing walls as part of the kennel structure.
Using your walls can save you money - but only works if the walls are 'dog-proof'!
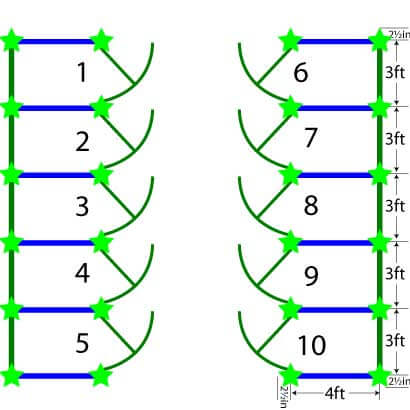
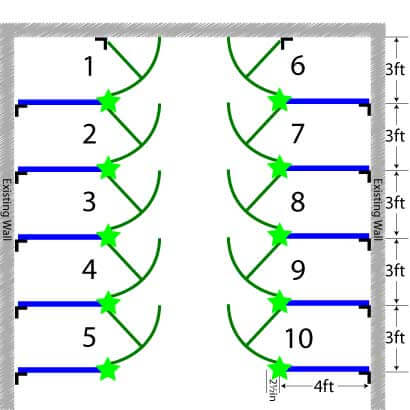
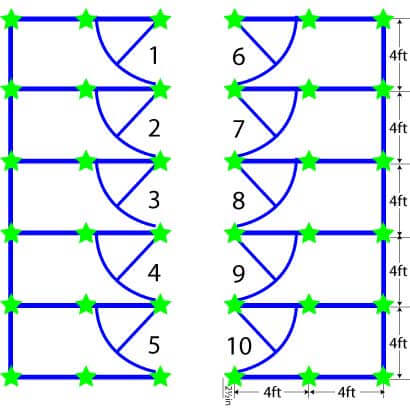
| 4' x 4' Full Kennels | 4' x 4' Kennels attached to a wall |
|
|
|
| Download the Layout | Download the Layout |

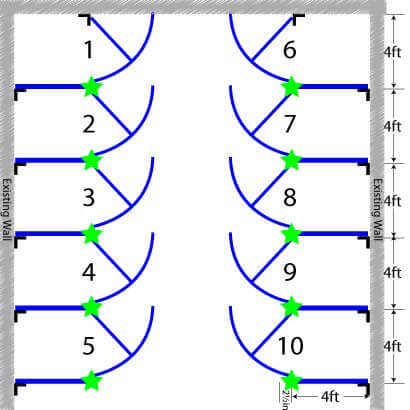
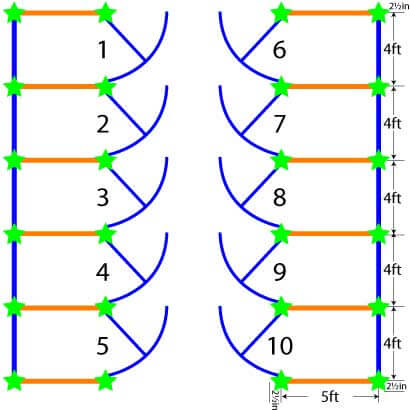
Our kennels can either be free-standing or use your existing walls as part of the kennel structure.
Using your walls can save you money - but only works if the walls are 'dog-proof'!
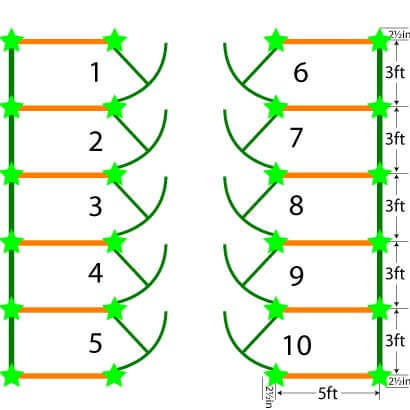
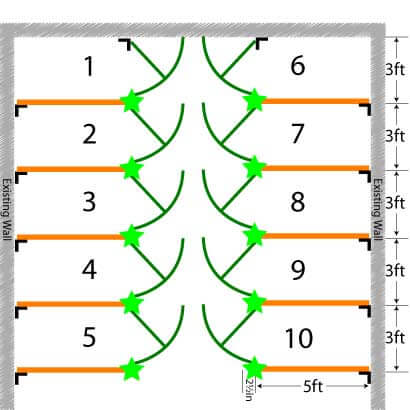
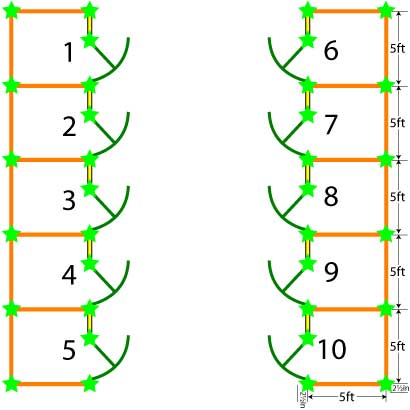
| 4' x 5' Full Kennels | 4' x 5' Kennels attached to a wall |
|
|
|
| Download the Layout | Download the Layout |
Our kennels can either be free-standing or use your existing walls as part of the kennel structure.
Using your walls can save you money - but only works if the walls are 'dog-proof'!
| 4' x 6' Full Kennels | 4' x 6' Kennels attached to a wall |
|
|
|
| Download the Layout | Download the Layout |

Our kennels can either be free-standing or use your existing walls as part of the kennel structure.
Using your walls can save you money - but only works if the walls are 'dog-proof'!
| 4' x 8' Full Kennels | 4' x 8' Kennels attached to a wall |
|
|
|
| Download the Layout | Download the Layout |

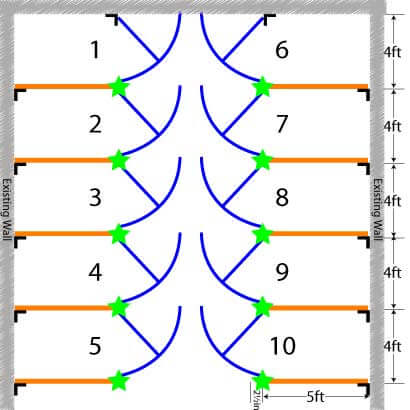
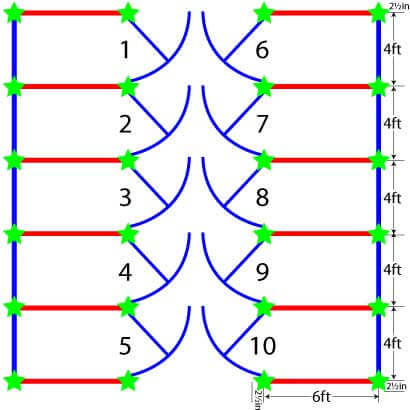
Our kennels can either be free-standing or use your existing walls as part of the kennel structure.
Using your walls can save you money - but only works if the walls are 'dog-proof'!
| 5' x 5' Full Kennels | 5' x 5' Kennels attached to a wall |
|
|
|
| Download the Layout | Download the Layout |
Our kennels can either be free-standing or use your existing walls as part of the kennel structure.
Using your walls can save you money - but only works if the walls are 'dog-proof'!
| 5' x 6' Full Kennels | 5' x 6' Kennels attached to a wall |
|
|
|
| Download the Layout | Download the Layout |
Our kennels can either be free-standing or use your existing walls as part of the kennel structure.
Using your walls can save you money - but only works if the walls are 'dog-proof'!
| 6' x 6' Full Kennels | 6' x 6' Kennels attached to a wall |
|
|
|
| Download the Layout | Download the Layout |
Be sure to check your quote for the specific kennel layout that matches your project.